Showing posts with label chocolate. Show all posts

Friday, 7 August 2015

The Honey & Co. Baking Book - Chocolate and Hazlenut Krantz Loaf


I AM NOW 23
Chocolate and Hazelnut krantz loaf
When did this happen? I have no idea. I woke up and I was 23 and now I need to look up how to pay taxes and buy houses. This is terrifying. I am....ADULTING.

Naturally the only reasonable response to this is to not acknowledge it's happening. So I'm just going to retreat into the kitchen and not give any notice to this strange maturation process. Come get me when I'm 99 and in need of an old folks home where once again I won't have to make my own decisions, and will instead allow people to push me along in a wheelchair while I mumble over recipe books.

Speaking of recipe books, a HUGE shoutout to everyone who got me a cooking related item (which was basically all of you) as a birthday gift. I am now in possession of a teal soup ladle that's been modeled after Nessie, the Great British Bake-Off cook book, a cook book by Mary Berry, a multipurpose grinder to make curry pastes and powders, and a truly fantastic cleaver. You all know me so well, thank you so very much.

Anyways! Today's post is the first recipe review of the Honey&Co. Baking book. The first of many I assure you. Every single dish in that book is screaming to be made and I can barely wait to try them all. I started with this one, because I was looking for an appropriate gift to thank my neighbours for being so nice after a little unpleasant encounter I had.

Last week while I was walking home two guys driving a van pulled up in front of me and asked me to get in with them. And in a fairly skeevy manner too. I gave them a very firm "um no thank you" and walked off, and as they drove ahead the guy in the passenger's seat gave me a sleazy grin and a wave. It was all very creepy, and as I was walking home, Kate (the lady who lives next door) was out in the garden and I told her what happened. She was very disturbed on my behalf and said I was free to come over if I wanted to. I got home, called the police, settled everything...but after they left I was pretty creeped out and not in the mood to be alone. So I went next door and Kate and David (her husband) were lovely. They offered to put me up for the night so I wouldn't be sleeping alone and I accepted.

Prove prove prove!
I was extremely grateful and wanted something nice to thank them. This chocolate and hazlenut krantz loaf really fit the bill.

This loaf is one of the three babka recipes listed in the book. And guys...it's beautiful.

You don't even understand. This is Cinnabon on crack. This is grown up nutella on toast. This is moist, buttery, cinnamony, chocolatey, nutty, chewy, soft heaven. It is rich. It is lush.

It might induce a sugar headache. Be sensible. Eat small slices.

Now...a quick side note. The posts that I do on the Honey&Co. baking book will not include corresponding recipes. They'll be more of...recipe reviews. How I found making the thing... any drawbacks or kinks... and tips I found helped me. Reason being, I don't feel very comfortable posting recipes from cook books. If (by some miracle) Sarit and Itamar read this post and say "Yeah, sure, go ahead, share our recipes", then I absolutely will because this is a recipe worth sharing. But till then, it's just going to be my experience baking the thing.

We cool?
Cool.


This was an amazing recipe to follow from start to finish. However, I will say one of the drawbacks right off the cuff is that it is time consuming. But not a bad sort of time consuming. There isn't hours and hours of intense labour, just a lot of waiting time in between. For starters, after making the dough you have to let it rest for atleast 6 hours in the fridge. Bottom line, plan ahead with this one. You will have to start the day before you want to eat it.

There is a basic babka dough recipe that Sarit and Itamar use, that is then filled and molded to make the various buns. This dough is very easy to work with. Like...EXTREMELY easy. I have made a lot of bread, from a lot of different recipes. There have been times where I have kneaded a 'dough' for 3 hours to have nothing but gloop on my counter. There was one time that the 'dough' I was working on was so tough, that by the time it was properly kneaded my wrist was sprained and stayed swollen for a week after.

This isn't at all the case here. Maybe because it's so intense on the butter, this dough comes together like a dream. All you need is about 5 minutes of kneading before you get a smooth elastic ball of putty in your hands. ALSO your hands come out super soft. I am not even kidding, your skin becomes a kind of soft no moisturizer will achieve. I could wax lyrical all day, but bottom line is that this is a beautiful, beautiful, beautiful dough to work with. Don't be scared, just get in there.
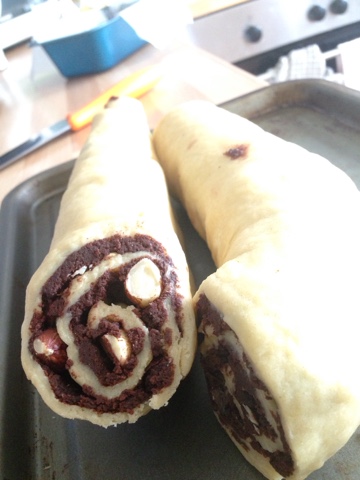
Rolled out and filled
I made the dough the night before, then had a nice lie in before waking up to make the filling. More butter goes into this, along with very dark chocolate, some ground cinnamon and a fair bit of sugar. Now, because I used granulated instead of caster sugar the filling came out quite grainy. Personally I liked it, cause it added a sugary crunch along with the nuts. You then roast a handful of hazelnuts and roughly chop them up to be sprinkled on top of the filling.

Sarit and Itamar tell you to leave the dough in the fridge till the last possible minute and I can see why. While it doesn't rise much (which I'm guessing happens because the dough uses all milk and no water), it's also very soft from all the butter. I would not be able to roll this out back home. Not without putting the slab in the freezer every 2 minutes, or working in an air conditioned room. You may think you won't be able to roll out the 50cm x 30cm rectangle specified. Don't worry, you will. Just keep at it. Again it's a very easy dough to work with, but just needs a little patience to be rolled out that thin. The amount of filling specified is perfect. You then sprinkle the hazelnuts over, roll up, then put it back in the fridge for 10 minutes before shaping.

Split in half to twist
It's a little fiddly splitting the log in half and twisting it, but don't worry. YOU are the boss of this dough. Just be firm, and pat any loose filling back into place.

This is the point where you leave it to prove for two hours....and I forgot about it. :p I wandered off to do some cleaning and came back about 3 hours later. Again, don't be surprised if it hasn't proved up alot. It will still feel soft and fluffy to the touch. Bake it and I CANNOT STRESS THIS ENOUGH.
USE
THE
SUGAR
SYRUP

Guys do it. don't worry about the loaf having too much sugar in it. Again, just have a small slice. The syrup makes this so so SO moist and gives it a lovely shine...just do it, ok? Promise me you'll do it.
Do it.

So yes, I don't have to tell you anything else about this loaf, I'll let the pictures do the rest of the talking. Please. Please. I'm begging you. Buy the book. Make this babka.

BOOM

Well done Honey&Co.

Sunday, 28 September 2014

FSC Chocolate Stout Cake...and the time I got a second chance at university.


Life is full of second chances.
It's been a little crazy lately. I didn't mean to take a break from the blog over the summer, but so many changes were taking place that I thought it'd be best to just take a step back from writing and focus on what was going on. One of the major changes that has happened is that I've had to change my degree pathway from a Bsc. Psychology, to Bsc. Biology. Well...I say 'had to' but honestly? It's working out better than I ever imagined it would.

Doing biology has been one surprise after another. The most basic one? that I actually do enjoy it. Looking back, I probably didn't hate the subject so much in first and second year. More like... I deemed it unnecessary? Because this wasn't what I planned to do with my life! I didn't plan on actually wanting to study about how bees pollinate flowers. I was supposed to be on my way to getting a psychology degree and helping children from troubled homes. I've been raised with the idea that I would choose to do something in university and that would determine the course of my entire life. Literally. Dad has been in medicine practically his whole life, starting off as a medical student and staying a doctor till this day. Mum went to nursing school, and while she's not a nurse anymore she still works in hospitals. Hell, up till about last year, she was still working in the same hospital that trained her all those years ago. At the time, doing Psychology seemed like the most sensible choice...but now I'm not so sure.

But anyways, giving Biology a second chance has been the most amazing thing that has happened to me in a while. I'm enjoying my classes, I've made new friends and rediscovered old ones and this year is really setting off with a bang. I'm not sure what this second chance in bio is going to lead to, but I hope it ends up the same way as my second chance with stout.


Dad first gave me a swig of stout when I was 16 and I ABSOLUTELY hated the stuff. Thought it was horrible and bitter...couldn't understand why anyone would like to drink it. Vowed I would never touch the stuff again. Well, I found this recipe in a cake chart being sold at the center where I did a biology field course just before classes started again this year. Saw the recipe, went meh, and left it forgotten in my bag till this week.

So I just turned in the lab report on Friday that I had to do for that course, and surprise, surprise found the cake chart I had bought in my bag. Open to the chocolate stout cake recipe. Well guess what? I'm a girl who knows a sign when she sees one. Hightailed it over to the St. Andrews Brewing Company and got myself a bottle of their oatmeal stout.

Ok...not gonna lie I haven't fallen madly in love with stout. But I'm not as repulsed by it as I was when I was 16. In fact it tasted pretty good. No where near as bitter as my first one was, very smooth and rounded. And in this cake? It works miracles. Thanks to the stout what would normally be a regular chocolate sponge becomes moist, and dense and very, very moreish. But at the same time it's light enough that you could comfortably eat a second slice without feeling too bloated.

And so I leave you with this recipe in good faith of second chances. However the cards may fall, I wish your tough decisions end like so; in acceptance, stout, and above all, chocolate.


Chocolate stout cake*
*The recipe for the cake comes by way of the Field Studies Council 70th anniversary cake chart. All proceeds from this recipe chart go towards the FSC Kids Fund, which provides financial support for groups of disadvantaged young people who would like to visit one of their centers for an FSC experience.

Cake
- 100g soft butter
- 250g dark soft brown sugar
- 2 eggs
- 150g a.p. flour
- 1/4tsp baking powder
- 1 tsp baking soda
- 50g cocoa powder
- 200ml stout

+ Preheat your oven to 180'C (160'C for a fan oven). Grease and line 2 20cm round cake tins.
+ Cream the butter and sugar together, then gradually mix in the beaten eggs.
+ Sift in the flour, baking powder, bicarb and cocoa in then fold through. Stir in the stout, and mix till well combined.
+ Divide between the two baking tins, and bake for 35 minutes, or till cake tester comes out clean from center. Allow to cool on wire rack for 10 minutes. Then unmould from baking tin and allow to cool completely.

Marscapone Cream
- 250g marscapone cheese
- 1/3 cup double cream
- 1/3 cup icing sugar.
- 1/2 punnet of raspberries
- grated chocolate
+ Beat together the cheese, double cream and icing sugar till nice and thick.

To assemble
- Put down a layer of cake and top with 2/3 of the marscapone cream. Dot the raspberries over that layer, reserving the prettiest one as a topping. Cover with the second layer of cake and pipe the remaining marscapone cream on top. Finish with a raspberry in the center, and chocolate shavings.


Friday, 12 September 2014

Chocolate Chunk Banana Bread...and the time I wanted a legit excuse to have chocolate for breakfast.


WHERE DID THE SEMESTER GO???
Seriously guys, this is ridiculous. I could've sworn I started second year just last week. How are we a month away from the summer holidays? How? This is outrageous. Unthinkable. WHAT EVEN?

It's times like these that really frighten me...cause so much has gone past and it really feels like I've barely accomplished anything. Well...maybe a few things. I'm slowly starting to branch out and figure out my own recipes for one thing. It's exciting and wonderful and quite the adventure I must say. Eventhough most times it's less about figuring out the right ingredient ratio and more about working around what I have left in my pantry.


This banana bread was something I've wanted to make for a while. It's very moist and full of rich bananana flavour. A lot of that will depend on how ripe your bananas are. You really need to let them go as spotty and black as you possibly can. Not like the ones in the first picture. I had to wait a couple of days for them to be really ready.  Overripe is the only way to go here. If they reach that perfect all-black stage but you haven't got time to turn them into banana bread, just bung them in the freezer, and defrost when you're ready.


Chocolate chunk banana bread.
- 2 large VERY ripe bananas
- 1 tsp honey
- 1/2 tsp vanilla
- 1/4 cup of 1 part vegetable oil and 1 part melted butter (I'm sorry, I know that sounds super weird but that's how it gets so moist without tasting oily)
- 1/4 cup yogurt
- 1 egg
- 1 cup flour
- 1/4tsp cinnamon
- 1/2 tsp baking soda
- 1/4 tsp salt
- 1/2 cup sugar
- 150g semi-sweet chocolate, cut up into chunks

+ Preheat oven to 180'C
+ Mash the bananas with the honey and vanilla. Beat in the yogurt, oil, butter and egg.


+ Shift in the flour, cinnamon, baking soda, salt, and sugar. Stir until just combined.
+ Stir chocolate chunks through batter.
+ Pour batter into well buttered loaf pan and bake for 50 minutes or until cake tester in center comes out clean.
+ Let cool in pan for 5 minutes, before turning out onto wire rack to cool completely.

Before we go, wanna see my beautiful Flavours of Malaysia profile picture?

Wanna know what Flavours of Malaysia is? Just click here!! -->

Wednesday, 12 March 2014

Alice Medrich's Cocoa Brownies


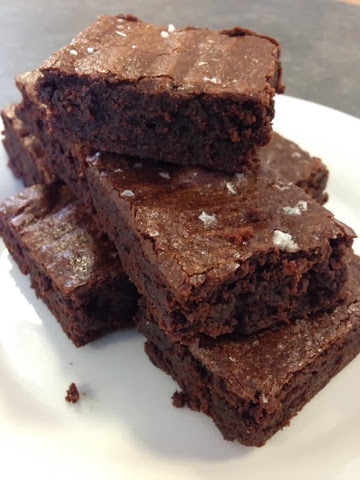
I'm really picky about my brownies. To me, a good brownie starts with the way it looks. Specifically that beautiful, crackly tissue paper crust. You know what I'm talking about right? That light, flaky top that all great brownies seem to have. Then when you bite into it, it shouldn't be cakey or gooey. No, a good brownie hits that golden sweet spot of FUDGY and it tastes of CHOCOLATE. Not a flat, vaguely cocoa-ish taste that disappears into a sugary abyss 2 seconds after you bite down. No. A superior brownie will punch you in the face with an intense, deep, dark chocolate high that'll swirl around your entire mouth till you basically see nothing but chocolate.


Having said that, I can't make a good brownie.
Don't get me wrong, I've tried over and over.
But brownies have always been a problem for me. I know they're supposed to be one of the first things you learn how to make, but I've never found a recipe that's been able to co-operate. Somehow it always ends up either dry or undercooked. Most times straight up burnt. NEVER with the Holy Grail of 'beautiful crust'. Maybe I'm being over-critical but I've just never been happy with how my brownies turn out.

So I'm still on my brownie quest. Maybe not quite with the determination and vengeance that I started off with, but I do try. It was on one of these brownie quirks that I tried making Alice Medrich's cocoa brownies. I've seen so much about them over the years online, but always passed them over as potential flops. I mean... a brownie recipe with no chocolate? Madness! Then one fateful evening a brownie craving arose and I didn't have any dark chocolate in my cupboard nor was I willing to walk 40 minutes to get some. I really wish now that moment had come sooner. Alice's brownies are brilliant. They've got that perfect fudgy texture and chocolatey flavour. I added a sprinkling of Maldon sea salt over the top and that did it for me. My only criticism was that I didn't get that crowning tissue paper crackle. Although, that could've been something I did wrong. Any ideas? Comment below if you know the secret to that beautiful top!


Alice Medrich's Cocoa Brownies

- 10 tablespoons (1 1/4 sticks) unsalted butter
- 1 1/4 cup sugar
- 3/4 cups plus 2 tablespoons unsweetened cocoa powder (natural or Dutch-process)
- 1/4 teaspoon salt
-1/2 teaspoon pure vanilla extract
- 2 cold large eggs
- 1/2 cup all-purpose flour
- 2/3 cups walnut or pecan pieces (optional)


+ Position a rack in the lower third of the oven and preheat the oven to 325°F. Line the bottom and sides of an 8-inch square baking pan with parchment paper or foil, leaving an overhang on two opposite sides.
+ Combine the butter, sugar, cocoa, and salt in a medium heatproof bowl and set the bowl in a wide skillet of barely simmering water (I just used the microwave. Blast for 30 seconds and stir. Repeat till smooth). Stir from time to time until the butter is melted and the mixture is smooth and hot enough that you want to remove your finger fairly quickly after dipping it in to test. Remove the bowl from the skillet and set aside briefly until the mixture is only warm, not hot.
+ Stir in the vanilla with a wooden spoon. Add the eggs one at a time, stirring vigorously after each one.
+ When the batter looks thick, shiny, and well blended, add the flour and stir until you cannot see it any longer, then beat vigorously for 40 strokes with the wooden spoon or a rubber spatula. Stir in the nuts, if using. Spread evenly in the lined pan.
+ Bake until a toothpick plunged into the center emerges slightly moist with batter, 20 to 25 minutes. Let cool completely on a rack. Lift up the ends of the parchment or foil liner, and transfer the brownies to a cutting board. Cut into 16 or 25 squares.

I'll leave you to bask in your chocolate comas. :p Till next time!

Wednesday, 13 November 2013

Tetly Biscuit Thing...and the time I got overconfident and had to improvise.

So I am going to talk about that Great British Bakeoff now.

1) I couldn't make it to the viewing party cause I had a society party that ran over a little late. Although I was rooting for Kimberly, I'm happy Ruby did not win.

2) Today's is a lesson on turning lemons into lemonade. And also...maybe a lesson in overconfidence.


This post is long long overdue. Partly because I've made a lot of things since, mostly because I've been trying to avoid it. It comes down to an age old food bloggers dilemma, should I post my failures or not?
But you know what? It's just shortbread. Life goes on, and I keep cooking. More than anything this post will be a lesson in humility. And posting my 'failures'? A reminder of the dangers of overconfidence, and that you can salvage almost any bad situation. 

So here's a rundown, I made the dough and it turned out to be a beautiful shortbread dough (as you can see above). 
Just the right amount of crumble yet easy to mould. I rolled it up into a log and let it chill in the fridge over night before the party the next day. 

Took it out and it cut BEAUTIFULLY. 


Lightly scented with Tetley tea... I was really really excited. I thought this would be a fantastic biscuit. 
Now.... They went into the oven like this:

And after 15 minutes in that 180'C oven...
To my horror...
They came out like this:


What the hell happened to my beautiful dainty shortbreads??

I tried one. 
In all honesty they tastes ok. Very very buttery with a nice black tea aftertaste. 
But still totally not what I was expecting. The texture, while not unpleasant, was like a chewy feuille rather than a crumbly shortbread. 
The clock was ticking and I had to be at my meeting in 30 minutes. I couldn't bring these with me to the bake off party!
Then suddenly, a little voice at the back of my head whispered
Throw in 2 eggs and some chocolate. 

So I did. And I baked it again with fingers crossed. 
What came out was a very strange... Soft cookie. Slightly eggy and very cakey. 

By this time I had to rush off for the society meeting and completely forgot to take the....bar cookies? Bar cookies with me. 

My Flatmate got me to try them again in the morning and to my surprise... They weren't bad. The eggy taste had gone away and was replaced with a strong taste of tea. The dark chocolate chunks gave the bake just the right amount of sweetness and made it a bit more lush. It wasn't the disaster I thought it was. 

In hindsight, I must have put the full weight of butter and forgot I was halving the recipe. Moral of the story? No matter how much 'experience' you think you have? Always always ALWAYS triple check your measurements. And if things go sour, just add 2 eggs and some chocolate. 

And maybe a little bit of luck. 


Monday, 28 October 2013

Brown Butter and Oatmeal Chocolate Chip Cookies...and the time I got some shocking news.


So, I know my next post was supposed to be about The Great British Bake Off and I will blog about that eventually. Right now there's something else that needs to be addressed.


Over the weekened my friend Rab was diagnosed with having brain cancer. When I found out...well...the news made no sense. Rab didn't do anything wrong. I mean sure...he partied and drank but ALWAYS in moderation. No more than what any other college kid would do. He's friendly, he's kind, he's funny and he's young. Younger than me even ( When he found out I was 21, he called me an 'old granny').

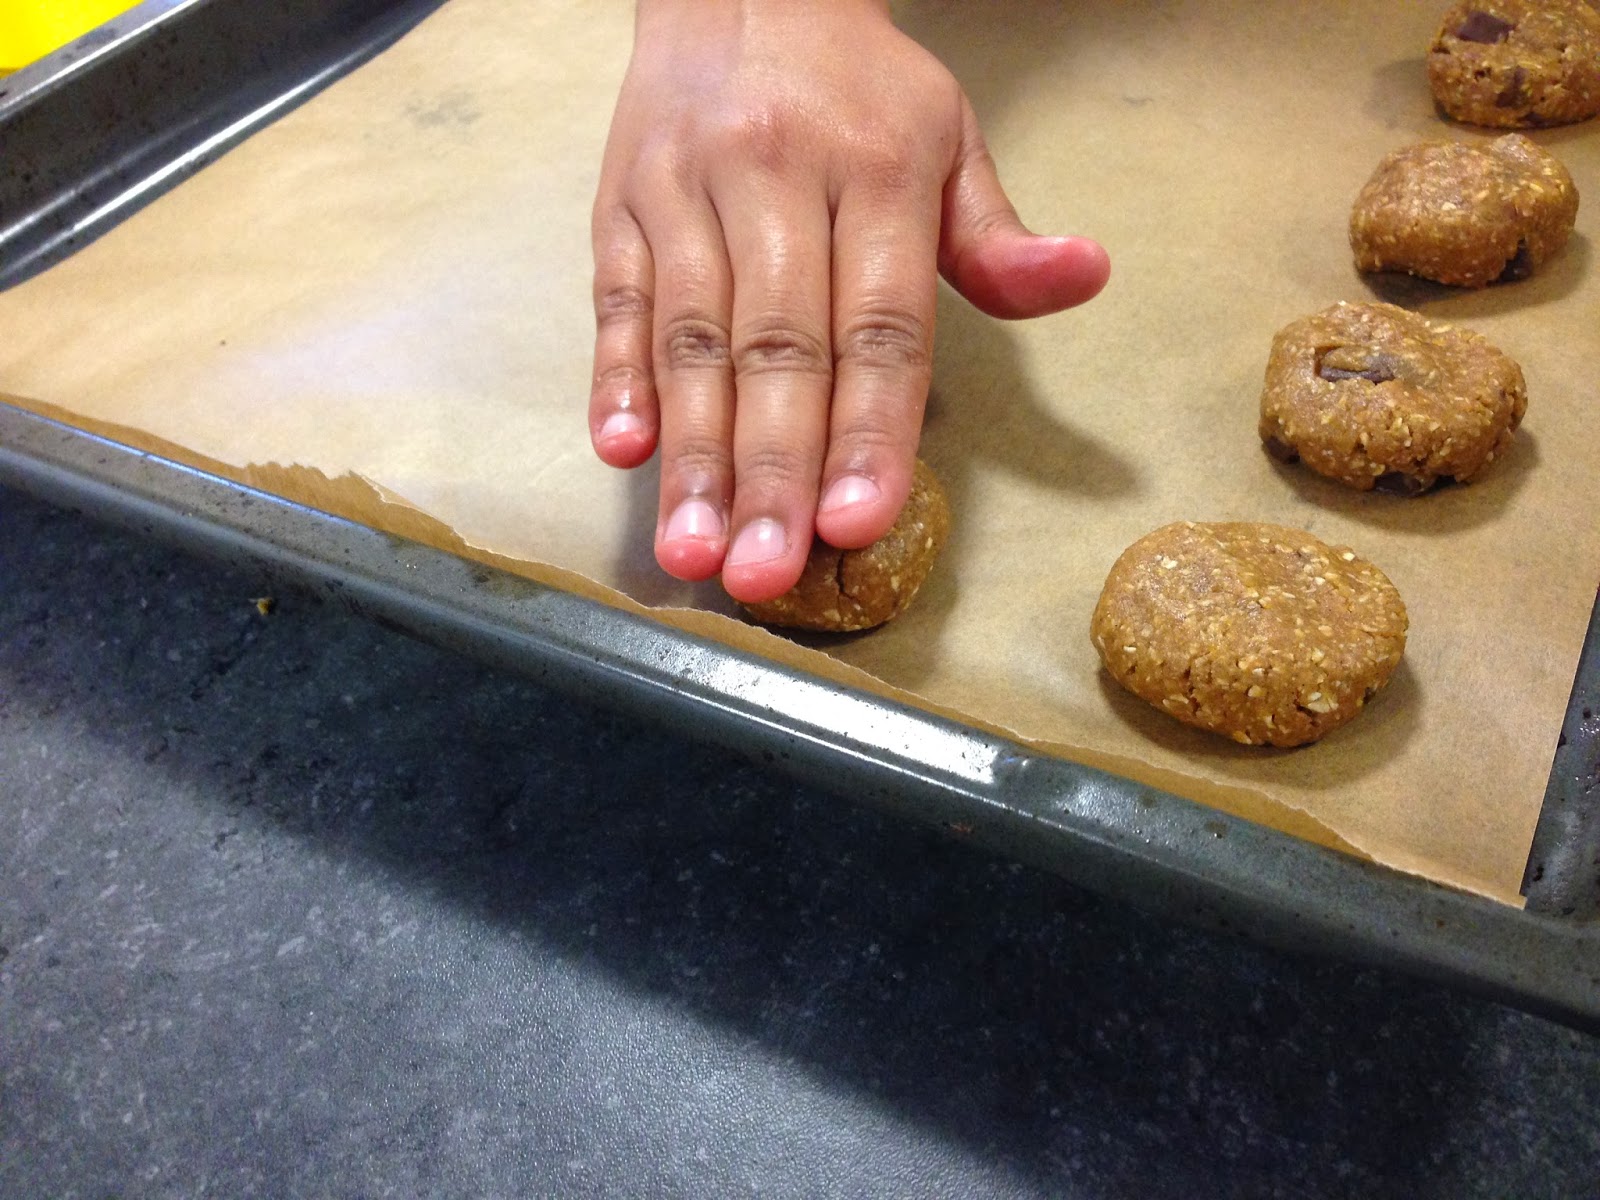
The weekend passed by in a bit of a haze. I remember heading into town to do some groceries, but having to stare at the aisles for a good 10 minutes not remembering a single thing I needed to buy. What I did remember, was the ingredients for these cookies. Making the dough and shaping it helped me move out of that strange little bubble. And as the perfumes of chocolate and caramel filled my kitchen, I slowly started to come to terms with the news. I took him a plateful of these when he had his friends over before he left. He liked them, and said they were really good.


Rab left for home with his parents yesterday. It's going to be a tough ride for him for a while now, but I know he's going to fight this tooth and nail. He'll be back in St. Andrews very, very soon, I'm sure of it.

I thank you for reading this far, and ask you to please take a moment to say a little prayer for Rab and to wish him a speedy recovery.

The recipe for these cookies came from HERE.
The only change I made was to add a bar and a half of chopped up dark chocolate.


Monday, 21 October 2013

Nutella Mille Crepe...and the time my kitchen was hijacked.


Look at those satisfied ( and slightly disturbed) faces! Everyone, meet Hannah, John, and Charlotte. They invaded my flat the other day for crepes and chocolate. Let it never be said that I don't deliver on feeding my guests. ;)

So I was going to make a mille crepe for John to 'apologize' for 'tormenting' him with pictures of food that he couldn't eat. But they finished with their bio practical a little earlier than expected, so I told them to guzzle the first batch of crepes with the chocolate filling before assembling them properly. After they left I made another half batch and came up with this:


11 crepes, stacked one on top of the other with dark chocolate and Nutella ganache sandwiching them. :) a wholly successful experiment.

Mille crepe
The crepes were made from this recipe from grabandgorecipes.com

Crepe

Ingredients:
4 eggs
2 cups of all purpose flour
3 cups of milk
1/3 cup of sugar or to taste
5 Tbsp. melted butter
Pinch of salt
 
Direction:
Whisk together milk, eggs, sugar and salt.  Slowly whisk  in flour until smooth.
Add melted butter and mix well.
The batter should be smooth and thin.
Lightly brush the medium 8″sauté pan with butter and head over medium heat.
Working quickly- pour in about 1/4 cup of batter, tilting the pan so the batter makes a circle and coats the bottom.


The crepes should be very thin.  Cook the crepe until the bottom is light brown. Loosen with a spatula, flip and cook the other side; remove to the flat platter.


Crepe, DONE. 

Next, make the filling. 
Dark Chocolate and Nutella Ganache
Ingredients:
150ml double cream
100g dark chocolate
2 heaped tbsp Nutella 

Put everything into a small pot and heat gently on the stove. Stir everyone in a while till nice and smooth. 

To assemble:

Start with a crepe on your plate and dab on 1 1/2 tbsp of filling. Smooth it out as best you can and then top with another crepe. Continue till you you are crepe-less. Mind you, this'll be tricky. The stack gets crazy wobbly the higher you get. If you really can't work with it, stick it in the fridge for 1/2 an hour to harden before you continue. When you get to your last crepe, dust with cocoa powder and have a shot of vodka to celebrate your success. 


Happy eating guys!